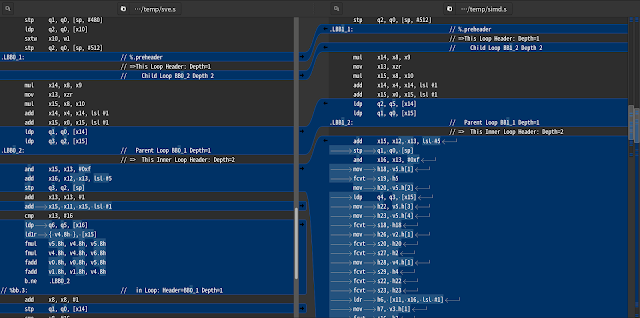
過往的 CPU 發展歷程中, x86 平台由於因應各種應用需求的提出, 而陸陸續續加入了不同的指令集, 此外也可能因為針對市場做等級區隔, 支援的數量與種類也不等. 在 Linux 平台上這些 CPU 資訊可以透過 /proc/cpuinfo 取得. 而對於 CPU 不同的指令集支援去實作軟體最佳化, 是相當繁複的工作. 而這些在過去分享過的 Function Multi-Versioning (FMV) 的出現, 而大幅地簡化.
隨著時間過去, 這十年來發展迅速的 ARM 平台, 在 ARMv8 之後不斷作小幅度的翻新, 也逐漸產生類似 x86 平台上的問題. 以 A-Profile 處理架構而言從 ARMv8.0-A 一路發展到 ARMv9.4-A. 當中有著許多新硬體特性與新增指令, 有些是 core feature 而有些則是 optional, 這些也逐漸造成了 ARM CPU 平台功能性上大小不等的碎片化. 在 ARM 官網有提供了一份 "Feature names in A-profile architecture" 列表. 而這整理僅止於 ARMv9 之前. 此外更麻煩的地方是, 各大 compiler 在先前一直沒有對應支援 FMV 的功能, 如此對於通用的應用程式, 想要能夠有效使用 ARM 這些功能特性同時顧及不支援的平台, 著實是一件不簡單的事.
而事情在 2023 年中開始有了轉機, 在當時所釋出的 Clang / LLVM 16.0 開始在 ARM 平台上支援 FMV 功能. ARM 官方甚至在其系列文的 "What's new in LLVM 16" 中有特別舉例說明 FMV 的使用. 一旦能夠使用 FMV, 這對於不確定運作的目標平台的應用程式開發很有幫助. 但在當時個人第一時間找不到具有支援的 llvm toolchain, 而之後的這段時間因工作繁忙一直沒有時間再繼續做嘗試, 也就沒辦法撰寫心得. 近日回想起心中所惦記的這麼一件事, 於是特別拿了最新的 Android NDK 26d (附的是 clang 17.0.2) 來測試.
Case Study - FP16 GEMM w/ Vector Extension, Gather Auto-Vectorization
__attribute__ ((target_clones ("avx512f", "avx2", "avx", "sse4.2", "default"))) void gemm_vec(float *a, int sa, float *b, int sb, float *c, int sc) { vfloat vb[TSIZE]; for(int y = 0; y < TSIZE; y++){ vb[y] = *((vfloat*)(b + sb*y)); } for(int y = 0; y < TSIZE; y++){ vfloat vc = *((vfloat*)(c + sc*y)); vfloat va = *((vfloat*)(a + sa*y)); for(int x = 0; x < TSIZE; x++){ vc += va[x] * vb[x]; } *((vfloat*)(c + sc*y)) = vc; } }
接著以 gcc 編譯:
$ gcc -O3 -shared mm.c -o libgemm.so
透過 objdump 觀察
$ objdump -t libgemm.so
可以看到中間有如下的輸出:
0000000000001720 l F .text 0000000000000c96 gemm_vec.default.4 00000000000023c0 l F .text 00000000000005df gemm_vec.avx512f.0 00000000000029a0 l F .text 00000000000005df gemm_vec.avx2.1 0000000000002f80 l F .text 000000000000060c gemm_vec.avx.2 0000000000003590 l F .text 0000000000000c95 gemm_vec.sse4_2.3
特定情況需要套用演算在特定區域上, 而非全畫面的處理
這時可以嘗試產生對應特定區域的 Buffer 物件
在 Halide::Runtime::Buffer 中支援 cropped 操作
對於此操作文件描述為 "Make an image that refers to a sub-range of this image along the given dimension.", 明確指出是直接參考 Buffer 的特定區域.
使用範例:
// We must forward-declare the name we want for the stub,
// inside the proper namespace(s). None of the namespace(s)
// may be anonymous (if they are, failures will occur at Halide
// compilation time).
namespace SomeNamespace { class MyGenStub; }
HALIDE_REGISTER_GENERATOR(MyGen, "my_gen", SomeNamespace::MyGenStub)
#include "/path/to/rgb_to_rcbcr.stub.h"

class AwesomeFilter : public Generator<AwesomeFilter> {
 public:
  Input<Func> input{"input", Float(32), 3};
  Output<Func> output{"output", Float(32), 3};

  void generate() {
    // Snap image into buckets while still in RGB.
    quantized(x, y, c) = Quantize(input(x, y, c));

    // Convert to YCbCr.
    rgb_to_ycbcr = RgbToYCbCr(this, {quantized});

    // Do something awesome with it. Note that rgb_to_ycbcr autoconverts to a Func.
    output(x, y, c) = SomethingAwesome(rgb_to_ycbcr(x, y, c));
  }
  void schedule() {
    // explicitly schedule the intermediate Funcs we used
    // (including any reusable Generators).
    quantized.
      .vectorize(x, natural_vector_size<float>())
      .compute_at(rgb_to_ycbcr, y);
    rgb_to_ycbcr
      .vectorize(x, natural_vector_size<float>())
      .compute_at(output, y);

    // *Also* call the schedule method for all reusable Generators we used,
    // so that they can schedule their own intermediate results as needed.
    // (Note that we may have to pass them appropriate values for ScheduleParam,
    // which vary from Generator to Generator; since RgbToYCbCr has none,
    // we don't need to pass any.)
    rgb_to_ycbcr.schedule();
 }

 private:
  Var x, y, c;
  Func quantized;
  RgbToYCbCr rgb_to_ycbcr;

  Expr Quantize(Expr e) { ... }
  Expr SomethingAwesome(Expr e) { ... }
};
// g 與 h 現在透過個別的包裝函式來呼叫 f. The wrappers are // 排程是透過包裝函式, 若無則 f 是以 inline 方式置於兩個包裝函式中. // 這兩者將獨立計算呼叫其所需的 f 區域. // 當以 compute_root 排程 f 函式, 將會計算 g 與 h 所需範圍的區域方塊,
// 而當中可能多數都是不被需要的資料.
// 因此亦能夠各自不同地排程
// 為了排程, 包裝函式自原始函式繼承了純變數,
// 因此能夠使用在定義 f 時使用一樣的 x 與 y: f.in(g).vectorize(x, 4); f.in(h).split(x, xo, xi, 2).reorder(xo, xi);
// 計算些微模糊化的輸入影像 Func blur("blur"); blur(x, y) = (img(x - 1, y - 1) + img(x, y - 1) + img(x + 1, y - 1) + img(x - 1, y ) + img(x, y ) + img(x + 1, y ) + img(x - 1, y + 1) + img(x, y + 1) + img(x + 1, y + 1));
blur.compute_root().gpu_tile(x, y, xo, yo, xi, yi, 8, 8);
// 以 ImageParam::in 建構的包裝函式 有著以 _0, _1 .. 等等所命名的純變數
// 對 blur 每個 tile 的變數排程, 並且將 _0 與 _1 對應到 gpu 執行緒
img.in(blur).compute_at(blur, xo).gpu_threads(_0, _1);
// Without Func::in, computing an 8x8 tile of blur would do // 8*8*9 loads to global memory. With Func::in, the wrapper // does 10*10 loads to global memory up front, and then blur // does 8*8*9 loads to shared/local memory.
// 建立一個有趣的輸入影響 Buffer input(258, 258); input.set_min(-1, -1); for (int y = input.top(); y <= input.bottom(); y++) { for (int x = input.left(); x <= input.right(); x++) { input(x, y) = x * 17 + y % 4; } }
img.set(input); blur.compile_jit(target); Buffer<int> out = blur.realize(256, 256);
// 確認結果一致 for (int y = out.top(); y <= out.bottom(); y++) { for (int x = out.left(); x <= out.right(); x++) { int val = out(x, y); int expected = (input(x - 1, y - 1) + input(x, y - 1) + input(x + 1, y - 1) + input(x - 1, y ) + input(x, y ) + input(x + 1, y ) + input(x - 1, y + 1) + input(x, y + 1) + input(x + 1, y + 1)); if (val != expected) { printf("out(%d, %d) = %d instead of %d\n", x, y, val, expected); return -1; } } } }
// (這段屬於架構專有解釋, 略譯). // Let's see some arbitrary but plausible values for the machine parameters. // // const int kParallelism = 32; // const int kLastLevelCacheSize = 16 * 1024 * 1024; // const int kBalance = 40; // MachineParams machine_params(kParallelism, kLastLevelCacheSize, kBalance); // // The arguments to MachineParams are the maximum level of parallelism // available, the size of the last-level cache (in KB), and the ratio // between the cost of a miss at the last level cache and the cost // of arithmetic on the target architecture, in that order.
for (int c = 0; c < input.channels(); ++c) { for (int y = 0; y < input.height(); ++y) { for (int x = 0; x < input.width(); ++x) { input(x, y, c) = rand(); } } }