這份簡報是 2016 下半年的兩場大學 Seminar 邀約所準備的演講投影片
主要內容是各種處理器架構上對於 SIMD 需要的基本知識, 以及優化時需要的考量
2017年1月12日 星期四

Video Compression Standards - History & Introduction 簡報
這份簡報是由於臺北科技大學的黃士嘉教授的邀約
為了數位電視的實務課程中向學生們介紹 MPEG 相關標準的歷史而所準備
為了數位電視的實務課程中向學生們介紹 MPEG 相關標準的歷史而所準備
2017年1月7日 星期六
三個願望一次滿足的 libdispatch (Grand Central Dispatch) (revised ver)
這篇也是先前在臉書網誌上發表的, 今年再修正一下相關的 issue
====
不可否認, 儘管 POSIX thread 存在已久, 但是其 Programming Model 並不容易讓一般 coder 能夠輕鬆駕馭, 而中間衍生的 data structure 與 interface 也讓許多人頭疼, 然而享有多核平台的好處, 使用 thread 又是必要的.
不可否認, 儘管 POSIX thread 存在已久, 但是其 Programming Model 並不容易讓一般 coder 能夠輕鬆駕馭, 而中間衍生的 data structure 與 interface 也讓許多人頭疼, 然而享有多核平台的好處, 使用 thread 又是必要的.
而綜觀 thread 的用途大致有三:
- 利用 thread 來利用多核加速 (這也是多數其他 framework 專注的地方)
- timer background worker 實作
- event multiplexing (用以透過 handler 處理各式 event, 像是 blocked I/O )
Apple 於 2009 年以 Apache License 釋出了 Grand Central Dispatch (GCD) 的原始碼, 透過其 framework 搭配 blocks 的使用, 能一致性地處理上述三個面向的問題。時至今日, 儘管數年過去了, 個人認為 GCD/libdispatch 依然是設計上最出眾的 multi-thread framework.
在 Apple 釋出後不久, 在開放社群的努力下有了 FreeBSD port, 而 Linux 平台上也因Mark Heily的 OpenGCD 專案, 使得 Linux 平台也能夠使用 libdispatch, 在一般 Linux 上, 像是 ubuntu 已有現成包好的 package, 可以透過下列指令安裝
sudo apt-get install libdispatch-dev
然而對於 Linux 平台上的 package, 多數較為老舊 svn197, 若需要比較新的版本可以去官方的 github 抓取最新的 svn685 版本編譯使用
但對於Android 平台上, 若想要使用, 我們可以透過 PSPDFKit-labs 的移植搭配 NDK
以下列步驟來編譯 svn197 版
1. 請於確認與設定好環境具有 NDK, git
2. 建立 libdispatch 工作目錄與 子目錄 jni
$ mkdir -p libdispatch/jni; cd libdispatch/jni
libdispatch
3. 於 jni 目錄下自 PSPDFKit-labs 抓取 blocksruntime, libkqueue 與 libdispatch
$ git clone https://github.com/PSPDFKit-labs/blocksruntime.git
$ git clone https://github.com/PSPDFKit-labs/libkqueue.git
$ git clone https://github.com/PSPDFKit-labs/libdispatch.git
4. 於 jni 下建立 Android.mk 與 Application.mk 內容如下最後於 libdispatch 目錄下透過 ndk-build 指令即可編譯出 libdispatch.soApplication.mk#APP_ABI := armeabi-v7aAPP_ABI := arm64-v8aAndroid.mk:LOCAL_PATH := $(call my-dir)
include $(CLEAR_VARS)
LOCAL_MODULE := blocksruntime
LOCAL_C_INCLUDES := $(LOCAL_PATH)/blocksruntime
LOCAL_SRC_FILES := \
blocksruntime/BlocksRuntime/data.c \
blocksruntime/BlocksRuntime/runtime.c
include $(BUILD_STATIC_LIBRARY)
include $(CLEAR_VARS)
LOCAL_MODULE := libkqueue
LOCAL_C_INCLUDES := \
$(LOCAL_PATH)/libkqueue/src/common \
$(LOCAL_PATH)/libkqueue/android \
$(LOCAL_PATH)/libkqueue/include
LOCAL_CFLAGS := -std=c99 -D_XOPEN_SOURCE=600 -fvisibility=hidden -DCLANG_TLS_WORKAROUND
LOCAL_SRC_FILES := \
libkqueue/src/common/filter.c \
libkqueue/src/common/knote.c \
libkqueue/src/common/map.c \
libkqueue/src/common/kevent.c \
libkqueue/src/common/kqueue.c \
libkqueue/src/posix/platform.c \
libkqueue/src/linux/platform.c \
libkqueue/src/linux/read.c \
libkqueue/src/linux/write.c \
libkqueue/src/linux/user.c \
libkqueue/src/linux/vnode.c \
libkqueue/src/linux/timer.c \
libkqueue/src/posix/signal.c
include $(BUILD_STATIC_LIBRARY)
include $(CLEAR_VARS)
LOCAL_MODULE := libdispatch
LOCAL_C_INCLUDES := $(LOCAL_PATH)/libdispatch/android \
LOCAL_C_INCLUDES += $(LOCAL_PATH)/libdispatch/android/config \
$(LOCAL_PATH)/libdispatch/ \
$(LOCAL_PATH)/libdispatch/os \
$(LOCAL_PATH)/libdispatch/private \
$(LOCAL_PATH)/libkqueue/include \
$(LOCAL_PATH)/libpwq/include \
$(LOCAL_PATH)/blocksruntime/BlocksRuntime
LOCAL_CFLAGS := -fvisibility=hidden -momit-leaf-frame-pointer -fblocks -DHAVE_CONFIG_H
LOCAL_SRC_FILES := \
libdispatch/src/apply.c \
libdispatch/src/benchmark.c \
libdispatch/src/data.c \
libdispatch/src/init.c \
libdispatch/src/io.c \
libdispatch/src/object.c \
libdispatch/src/once.c \
libdispatch/src/queue.c \
libdispatch/src/semaphore.c \
libdispatch/src/source.c \
libdispatch/src/time.c \
libdispatch/src/transform.c
ifeq ($(TARGET_ARCH_ABI),x86_64)
LOCAL_CFLAGS += -DHAVE_GETPROGNAME
endif
ifeq ($(TARGET_ARCH_ABI),arm64-v8a)
LOCAL_CFLAGS += -DHAVE_GETPROGNAME
endif
ifeq ($(TARGET_ARCH_ABI),armeabi-v7a)
LOCAL_CFLAGS += -DHAVE_VALLOC
endif
LOCAL_STATIC_LIBRARIES := blocksruntime libkqueue
include $(BUILD_SHARED_LIBRARY)
最後可以測試一下, 這裡我們小修改了, "你也可以寫 SIMD 比寫網頁快"的範例
以 8x8 為轉置單位
void transpose8x8(int *src, int *dst, int w, int h)而 gcd_transpose 的使用方式如下
{
int8 row0 = *((int8*)(src)); src+=w;
int8 row1 = *((int8*)(src)); src+=w;
int8 row2 = *((int8*)(src)); src+=w;
int8 row3 = *((int8*)(src)); src+=w;
int8 row4 = *((int8*)(src)); src+=w;
int8 row5 = *((int8*)(src)); src+=w;
int8 row6 = *((int8*)(src)); src+=w;
int8 row7 = *((int8*)(src));
int8 tmp0, tmp1, tmp2, tmp3, tmp4, tmp5, tmp6, tmp7;
tmp0 = (int8){row0.s0, row1.s0, row2.s0, row3.s0, row4.s0, row5.s0, row6.s0, row7.s0};
tmp1 = (int8){row0.s1, row1.s1, row2.s1, row3.s1, row4.s1, row5.s1, row6.s1, row7.s1};
tmp2 = (int8){row0.s2, row1.s2, row2.s2, row3.s2, row4.s2, row5.s2, row6.s2, row7.s2};
tmp3 = (int8){row0.s3, row1.s3, row2.s3, row3.s3, row4.s3, row5.s3, row6.s3, row7.s3};
tmp4 = (int8){row0.s4, row1.s4, row2.s4, row3.s4, row4.s4, row5.s4, row6.s4, row7.s4};
tmp5 = (int8){row0.s5, row1.s5, row2.s5, row3.s5, row4.s5, row5.s5, row6.s5, row7.s5};
tmp6 = (int8){row0.s6, row1.s6, row2.s6, row3.s6, row4.s6, row5.s6, row6.s6, row7.s6};
tmp7 = (int8){row0.s7, row1.s7, row2.s7, row3.s7, row4.s7, row5.s7, row6.s7, row7.s7};
*((int8*)(dst)) = tmp0; dst+=h;
*((int8*)(dst)) = tmp1; dst+=h;
*((int8*)(dst)) = tmp2; dst+=h;
*((int8*)(dst)) = tmp3; dst+=h;
*((int8*)(dst)) = tmp4; dst+=h;
*((int8*)(dst)) = tmp5; dst+=h;
*((int8*)(dst)) = tmp6; dst+=h;
*((int8*)(dst)) = tmp7;
}
void gcd_transpose(dispatch_queue_t queue, dispatch_group_t group, int *src, int *dst, int w, int h)
{
for(int x = 0; x < w; x+=8){
dispatch_group_async(
group,
queue,
^{
for(int y = 0; y < h; y+=8){
transpose8x8(src+y*w+x, dst+x*h+y, w, h);
}
}
);
}
dispatch_group_wait(group, DISPATCH_TIME_FOREVER);
}
dispatch_group_t group = dispatch_group_create();編譯的方式
dispatch_queue_t queue = dispatch_get_global_queue(DISPATCH_QUEUE_PRIORITY_HIGH,NULL);
gcd_transpose(queue, group, src, out1, TEST_W, TEST_H);
dispatch_release(group);
dispatch_release(queue);
* Ubuntu
clang -O3 -fblocks -mavx -mfma -o test test.c -ldispatch -lBlockRuntime* Android 請使用以上產生的 libdispatch.so 置於 test 的 jni 下, 並於 Android.mk 加入
LOCAL_LDLIBS := -L$(LOCAL_PATH) -ldispatch個人在 i7-3612QM 上, 速度為單核 1.5X.
Android 上曾以此於 Nexus 9 (四核平台)上做過 memory copy 的測試, 為單核 2.7X.
儘管對 multi-threading programming 熟稔的人使用 libdispatch 與直接使用 pthread 差異落差會感覺其實還好, 但可以觀察到藉由使用 Blocks 的方式, 能夠省去建構用以傳遞各 thread 執行所需資訊的資料結構之必要, 而由於 loop 中的變數值更可以直接取值使用, Blocks 這樣的特性使得執行流程簡潔又同時具有效能的延伸性. 另外在 Android N 之後預設使用 clang 編譯, 即能同夠使用 libdispatch 與 Blocks 來寫出更簡潔好讀兼顧效率的程式碼。
延伸閱讀:
2. libdispatch tutorial (timer usage)
4. Directory Monitoring and GCD (event handle)
2017年1月6日 星期五
你也可以寫 SIMD 比寫網頁還快 - III
如果沒有特別的後續想法
這篇就是系列文的最後一篇
"你也可以寫 SIMD 比寫網頁快" 的精神
不外乎就是 簡單 快速 有效
延續上兩篇在最後想要談的是搭配 clang + OpenCL vector 的進階使用方式
這裡只探討一個問題 : 使用那些基本的運算符號是否就能用上所有的 SIMD 指令?
很明顯的, 答案是不行(否則就不會有這篇啦 XDDDD)
但是如果你知道特定好用的 SIMD 指令該如何套用呢?
舉例來說 ARM NEON 有個特別的指令 VQDMULH
它的用途是將兩個 16/32bit 數值相乘後所產生的 32/64bit 數值, 取其高位的 16/32bit
以 code 表示的話:
這時我們可以這麼做:
而基本的精神並不是什麼難以理解的事
僅是透過 pointer 作 NEON vector 與 OpenCL vector 的型別替換使用
而在之後要換回使用 OpenCL vector 可以透過一樣的方式轉回
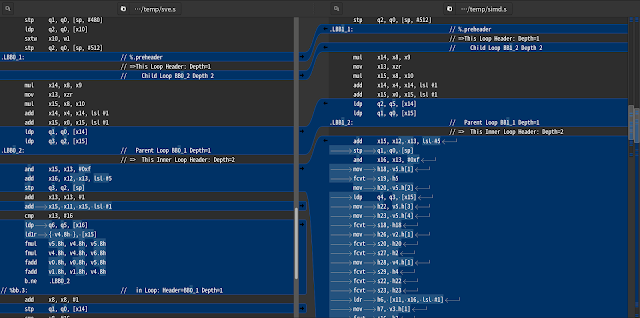
接著我們可以透過 vec.s 觀察 clang code generation 的結果:
64b 的 (d16,d17) 即為 128b 的 q8
64b 的 (d18,d19) 即為 128b 的 q9
所以可以看到這樣的作法並沒有因此產生多餘的指令
是不是很簡單呢?
在此 "你也可以寫 SIMD 比寫網頁還快" 系列文告一段落
這篇就是系列文的最後一篇
"你也可以寫 SIMD 比寫網頁快" 的精神
不外乎就是 簡單 快速 有效
延續上兩篇在最後想要談的是搭配 clang + OpenCL vector 的進階使用方式
這裡只探討一個問題 : 使用那些基本的運算符號是否就能用上所有的 SIMD 指令?
很明顯的, 答案是不行(否則就不會有這篇啦 XDDDD)
但是如果你知道特定好用的 SIMD 指令該如何套用呢?
舉例來說 ARM NEON 有個特別的指令 VQDMULH
它的用途是將兩個 16/32bit 數值相乘後所產生的 32/64bit 數值, 取其高位的 16/32bit
以 code 表示的話:
int a, b, c;這指令對於 NEON 上實作常數的除法, 或是 fixed-point 的實作上很有幫助
...
c = sqdmulh(a, b);
// equal-to
int64 tmp;
tmp = a*b;
c = (int)(tmp>>32) ;
這時我們可以這麼做:
int4 va = {0, 1, 2, 3};上面的範例中 int32x4_t 為 NEON intrinsics 的 data type
int4 vb = {1, 2, 3, 4};
int4 vrab = vqdmulhq_s32(va, vb);
而基本的精神並不是什麼難以理解的事
僅是透過 pointer 作 NEON vector 與 OpenCL vector 的型別替換使用
而在之後要換回使用 OpenCL vector 可以透過一樣的方式轉回
接著我們可以透過 vec.s 觀察 clang code generation 的結果:
adr r0, .LCPI2_0在此為了確認這些暫存器間的關係, 可以參考 (ARMv7) NEON registers
...
vld1.64 {d16, d17}, [r0:128]
...
adr r0, .LCPI2_1
vld1.64 {d18, d19}, [r0:128]
vqdmulh.s32 q8, q9, q8
64b 的 (d16,d17) 即為 128b 的 q8
64b 的 (d18,d19) 即為 128b 的 q9
所以可以看到這樣的作法並沒有因此產生多餘的指令
是不是很簡單呢?
在此 "你也可以寫 SIMD 比寫網頁還快" 系列文告一段落
The Power of Prefetching
這篇其實比"你也可以寫 SIMD 比網頁還快"早很多, 其中 I 的部分就是與這篇的 function 比較速度
====
====
先前在臉書上有分享過 “When Prefetching Works, When It Doesn’t, and Why”這篇 paper, 現在要用實例顯示 prefetching 帶來的效益, 今日使用的範例是 Matrix Transpose
一個簡單的 C 版本實作如下
void naive_transpose(int *src, int *dst, int w, int h){for(int x = 0; x < w; x++){for(int y = 0; y < h; y++){*(dst + x*h + y) = *(src + y*w + x);}}}
SSE2 實作版本如下, 由於先進處理器架構有著 automatic/speculative prefetcher 所以這裡我們故意寫得比較 CPU-unfriendly 一些
void sse_transpose(int *src, int *dst, int w, int h){for(int x = 0; x < w; x+=4){for(int y = 0; y < h; y+=4){__m128i I0 = _mm_loadu_si128 ((__m128i*)(src+y*w+x));__m128i I1 = _mm_loadu_si128 ((__m128i*)(src+(y+1)*w+x));__m128i I2 = _mm_loadu_si128 ((__m128i*)(src+(y+2)*w+x));__m128i I3 = _mm_loadu_si128 ((__m128i*)(src+(y+3)*w+x));__m128i T0 = _mm_unpacklo_epi32(I0, I1);__m128i T2 = _mm_unpackhi_epi32(I0, I1);__m128i T3 = _mm_unpackhi_epi32(I2, I3);I0 = _mm_unpacklo_epi64(T0, T1);I1 = _mm_unpackhi_epi64(T0, T1);I2 = _mm_unpacklo_epi64(T2, T3);I3 = _mm_unpackhi_epi64(T2, T3);_mm_storeu_si128((__m128i*)(dst+(x*h)+y), I0);_mm_storeu_si128((__m128i*)(dst+((x+1)*h)+y), I1);_mm_storeu_si128((__m128i*)(dst+((x+2)*h)+y), I2);_mm_storeu_si128((__m128i*)(dst+((x+3)*h)+y), I3);}}}
接著我們來撰寫一個使用 SSE prefetch 指令的加速版本
void sse_prefetch_transpose(int *src, int *dst, int w, int h){for(int x = 0; x < w; x+=4){for(int y = 0; y < h; y+=4){#define PFDIST 8 _mm_prefetch(src+(y+PFDIST)*w+x, _MM_HINT_T1);_mm_prefetch(src+(y+PFDIST+1)*w+x, _MM_HINT_T1);_mm_prefetch(src+(y+PFDIST+2)*w+x, _MM_HINT_T1);_mm_prefetch(src+(y+PFDIST+3)*w+x, _MM_HINT_T1);__m128i I0 = _mm_loadu_si128 ((__m128i*)(src+y*w+x));__m128i I1 = _mm_loadu_si128 ((__m128i*)(src+(y+1)*w+x));__m128i I2 = _mm_loadu_si128 ((__m128i*)(src+(y+2)*w+x));__m128i I3 = _mm_loadu_si128 ((__m128i*)(src+(y+3)*w+x));__m128i T0 = _mm_unpacklo_epi32(I0, I1);__m128i T1 = _mm_unpacklo_epi32(I2, I3);__m128i T2 = _mm_unpackhi_epi32(I0, I1);__m128i T3 = _mm_unpackhi_epi32(I2, I3);I0 = _mm_unpacklo_epi64(T0, T1);I1 = _mm_unpackhi_epi64(T0, T1);I2 = _mm_unpacklo_epi64(T2, T3);I3 = _mm_unpackhi_epi64(T2, T3);_mm_storeu_si128((__m128i*)(dst+(x*h)+y), I0);_mm_storeu_si128((__m128i*)(dst+((x+1)*h)+y), I1);_mm_storeu_si128((__m128i*)(dst+((x+2)*h)+y), I2);_mm_storeu_si128((__m128i*)(dst+((x+3)*h)+y), I3);}}}
接著是測試程式(請將上述程式碼置於指定位置)
#include#include#include#include//for using x86-SSE2 intrinsics you have to include this #include#define TEST_W 4096#define TEST_H 4096 int main(void){//verify the result of 4x4 matrix{int testin[16] = { 0, 1, 2, 3, 4, 5, 6, 7, 8, 9, 10, 11, 12, 13, 14, 15 };int testout[16]; for(int y = 0; y < 4; y++){for(int x = 0; x < 4; x++)printf(" %2d", testin[y*4+x]);printf("\n");}printf("\n");sse_transpose(testin, testout, 4, 4);for(int y = 0; y < 4; y++){for(int x = 0; x < 4; x++)printf(" %2d", testout[y*4+x]);printf("\n");}}{struct timeval stime, etime;int *src = (int*)malloc(sizeof(int)*TEST_W*TEST_H);int *out0 = (int*)malloc(sizeof(int)*TEST_W*TEST_H);int *out1 = (int*)malloc(sizeof(int)*TEST_W*TEST_H);int *out2 = (int*)malloc(sizeof(int)*TEST_W*TEST_H);srand(time(NULL));for(int y = 0; y < TEST_H; y++){for(int x = 0; x < TEST_W; x++)*(src + y*TEST_W + x) = rand();} gettimeofday(&stime, NULL);sse_prefetch_transpose(src, out0, TEST_W, TEST_H);gettimeofday(&etime, NULL);printf("sse prefetch: %ld us\n", (etime.tv_sec - stime.tv_sec)*1000000 + (etime.tv_usec - stime.tv_usec));gettimeofday(&stime, NULL);sse_transpose(src, out1, TEST_W, TEST_H);gettimeofday(&etime, NULL);printf("sse: %ld us\n", (etime.tv_sec - stime.tv_sec)*1000000 + (etime.tv_usec - stime.tv_usec));gettimeofday(&stime, NULL);naive_transpose(src, out2, TEST_W, TEST_H);gettimeofday(&etime, NULL);printf("naive: %ld us\n", (etime.tv_sec - stime.tv_sec)*1000000 + (etime.tv_usec - stime.tv_usec)); free(src);free(out0);free(out1);free(out2);} return 0;}
存成 test.c, 並且按照下列方式編譯
gcc -msse2 -o test test.c
於個人的 Core i7 3612QM 執行得到下列結果
0 1 2 34 5 6 78 9 10 1112 13 14 150 4 8 121 5 9 132 6 10 143 7 11 15sse prefetch: 57782 ussse: 117184 usnaive: 228870 us
儘管現今 CPU 有著強大的 auto-prefetcher, 但是並不是所有的演算都有著規律或是線型的記憶體存取模式, 如此透過優化 prefetching 依然是能夠有相當的效能增進.
你也可以寫 SIMD 比寫網頁還快 - II
第一篇並沒有介紹 clang 中的 OpenCL kernel 一些基礎 型別宣告部分, 已經在上一篇出現過了, 所以這裡就從使用開始. 首先是 vector 的初始化
typedef int int4 __attribute__((ext_vector_type(4)));typedef int int8 __attribute__((ext_vector_type(8)));int a = 3;int4 va = {1, 2, 3, 4};int4 vb = 3;
接著是個別的 access, 下列的方式很適合做資料格式上的操作 在等號的兩邊可以用不同的表示法, 沒有需要一致:
va.x = a;// the below two lines are equivalent.vb.xyw = va.xzw;vb.s013 = va.s023;// repeat is okva = vb.xyyz;// high and low partva.hi = va.lo;va.lo = vb.hi;// even and oddva.odd = vb.even;
Vector 簡單的計算如下, 可以參照 clang - vectors and extended vectors 的列表:
// scalar multiplyva = a * vb;// element-wise multiplyva = va * vb;va = va | vb;va = -va;
不同型別的 vector 轉換:
typedef float float4 __attribute__((ext_vector_type(4)));// format convertionfloat4 vfa = __builtin_convertvector(va, float4);// data reinterpretfloat4 vfa = (float4)va;
接著來實戰一番吧, 下列為以 bayer format 平均 GRBG 4個像素, 轉為1/4大小灰階圖的範例
void bayer_convert(char *src, char *gray, int w, int h){for(int y = 0; y < h; y+=2){for(int x = 0; x < w; x+=16){//bayer raw data fetchushort8 pix00 = __builtin_convertvector(*((uchar8*)(src+x)), ushort8);ushort8 pix01 = __builtin_convertvector(*((uchar8*)(src+x+8)), ushort8);ushort8 pix10 = __builtin_convertvector(*((uchar8*)(src+x+w)), ushort8);ushort8 pix11 = __builtin_convertvector(*((uchar8*)(src+x+w+8)), ushort8);ushort8 pix_g0;pix_g0.lo = pix00.even;pix_g0.hi = pix01.even;ushort8 pix_r;pix_r.lo = pix00.odd;pix_r.hi = pix01.odd;ushort8 pix_b;pix_b.lo = pix10.even;pix_b.hi = pix11.even;ushort8 pix_g1;pix_g1.lo = pix10.odd;pix_g1.hi = pix11.odd;// average! so simpleushort8 pix_out = (pix_g0 + pix_r + pix_b + pix_g1) ;// write out*((uchar8*)(gray+(x/2))) = __builtin_convertvector(pix_out, uchar8);}src += w*2;gray += w;}}
如何? 比起看 intrinsics function 來得清楚與簡單吧
有興趣記得編譯時加入 --save-temps 來看使用的指令!!! 下一篇會介紹進階的使用方式
2017年1月5日 星期四
你也可以寫 SIMD 比寫網頁還快 - I
看到 Jim Huang 要開”從無到有自幹 boot loader 比寫網頁還快” 除了幫他打廣告外, 也趕快搭這個熱潮, 證明人人可以寫 SIMD 比網頁還快 去年寫了系列 MMX/SSE 去處理 Matrix Transpose 但是看到 SSE/AVX intrinsics 很多人大概就眼睛花了 若加上實際應用還要從 Intel 網頁查找適當的 intrinsics 會覺得難以下手 搭配適當的工具, 你也可以是 SIMD 高手! 這裡最重要的工具是 - clang clang 如同 gcc 一般提供了許多 extension 其中很重要的一點是 Vectors and Extended Vectors 這個 extension 請特別注意 link 中的 OpenCL vector, 底下的表格表示此方式提供相當全面的 operator 而 clang 中使用 OpenCL vector 這即是這裡所推荐的方式 (還可以學會 OpenCL kernel 的部份撰寫!) 首先來以 clang 方式定義 OpenCL vector 的型別
typedef int int8 __attribute__((ext_vector_type(8)));
UPDATED: 對於 GCC 支援相近語法, 其宣告為 (其中 vector_size 以 byte 計)
這裡定義了長度為 8 的 int vector type 接著我們來實作先前時做過的 matrix transpose 功能
typedef int int8 __attribute__ ((vector_size (32)));
這裡定義了長度為 8 的 int vector type 接著我們來實作先前時做過的 matrix transpose 功能
void transpose8x8(int *src, int *dst, int w, int h){
for(int x = 0; x < w; x+=8){
for(int y = 0; y < h; y+=8){
int8 row0 = *((int8*)(src+y*w+x));
int8 row1 = *((int8*)(src+(y+1)*w+x));
int8 row2 = *((int8*)(src+(y+2)*w+x));
int8 row3 = *((int8*)(src+(y+3)*w+x));
int8 row4 = *((int8*)(src+(y+4)*w+x));
int8 row5 = *((int8*)(src+(y+5)*w+x));
int8 row6 = *((int8*)(src+(y+6)*w+x));
int8 row7 = *((int8*)(src+(y+7)*w+x));
int8 tmp0, tmp1, tmp2, tmp3, tmp4, tmp5, tmp6, tmp7;
tmp0 = (int8){row0.s0, row1.s0, row2.s0, row3.s0, row4.s0, row5.s0, row6.s0, row7.s0};
tmp1 = (int8){row0.s1, row1.s1, row2.s1, row3.s1, row4.s1, row5.s1, row6.s1, row7.s1};
tmp2 = (int8){row0.s2, row1.s2, row2.s2, row3.s2, row4.s2, row5.s2, row6.s2, row7.s2};
tmp3 = (int8){row0.s3, row1.s3, row2.s3, row3.s3, row4.s3, row5.s3, row6.s3, row7.s3};
tmp4 = (int8){row0.s4, row1.s4, row2.s4, row3.s4, row4.s4, row5.s4, row6.s4, row7.s4};
tmp5 = (int8){row0.s5, row1.s5, row2.s5, row3.s5, row4.s5, row5.s5, row6.s5, row7.s5};
tmp6 = (int8){row0.s6, row1.s6, row2.s6, row3.s6, row4.s6, row5.s6, row6.s6, row7.s6};
tmp7 = (int8){row0.s7, row1.s7, row2.s7, row3.s7, row4.s7, row5.s7, row6.s7, row7.s7};
*((int8*)(dst+(x*h)+y)) = tmp0;
*((int8*)(dst+((x+1)*h)+y)) = tmp1;
*((int8*)(dst+((x+2)*h)+y)) = tmp2;
*((int8*)(dst+((x+3)*h)+y)) = tmp3;
*((int8*)(dst+((x+4)*h)+y)) = tmp4;
*((int8*)(dst+((x+5)*h)+y)) = tmp5;
*((int8*)(dst+((x+6)*h)+y)) = tmp6;
*((int8*)(dst+((x+7)*h)+y)) = tmp7;
}
}
}
將上列內容與先前的範例結合, 最後就是編譯了
clang -O3 -mavx -mfma -o test test.c
以下為在 Intel(R) Core i7-3612QM 的執行結果
clang vector: 35759 us
sse: 41246 us
naive: 146310 us
這樣是不是很快呢? 甚至比之前直接用 SSE intrinsics 寫的還快!!!(灑花) 更棒的是這樣的 SIMD 撰寫, 透過 clang 是可以在各種硬體平台的 可以自己試試看用 NDK 然後跑在自己的手機看看喔!!
訂閱:
文章 (Atom)
在 ARM 平台上使用 Function Multi-Versioning (FMV) - 以使用 Android NDK 為例
Function Multi-Versioning (FMV) 過往的 CPU 發展歷程中, x86 平台由於因應各種應用需求的提出, 而陸陸續續加入了不同的指令集, 此外也可能因為針對市場做等級區隔, 支援的數量與種類也不等. 在 Linux 平台上這些 CPU 資訊可以透過...
-
近日應公司同仁邀請分享對 Halide 做介紹 於是基於 2019 的投影片做一點整理並增加一點常被詢問的資訊
-
 這幾年個人在影像處理程式優化的領域打滾, 如果問到感到棘手的工作, floating point 的處理應該可以排上很前面的名次 在許多演算來說由於同時對於 precision 與 dynamic range 的需求, 因此在計算過程中對於浮點數的使用是非常常見的 (若要避免...
-
 現今對於 Daily Linux Developer / User 面對不同程式/開發版本環境感到很頭疼, 常常疲於 執行舊版程式需要安裝舊版本 Library, 設定 RPATH / LD_LIBRARY_PATH 開發需求建立不同的版本 SDK 開發/執行環境, 在較舊系統...